Web Dev Client Project: Part 3
Contents
- 1 List updates
- 2 Colors
- 3 Changing the border colors
- 4 Try it out
- 5 Classes
- 6 Add your class names
- 7 Styling the list headings
- 8 Side-by-side lists
- 9 Using flexbox
- 10 How to create a flex container
- 11 The resulting code
- 12 Hyperlinks
- 13 About us page
- 14 JavaScript
- 15 Slideshow: Create the HTML Structure
- 16 Slideshow: Use the Code Library
- 17 Finished!
List updates
Your client now wants three changes to the lists on the homepage:
- The borders around each of the lists should have a different color.
- Make each list heading the same color as the border.
- Make the lists side-by-side, instead of on top of each other.
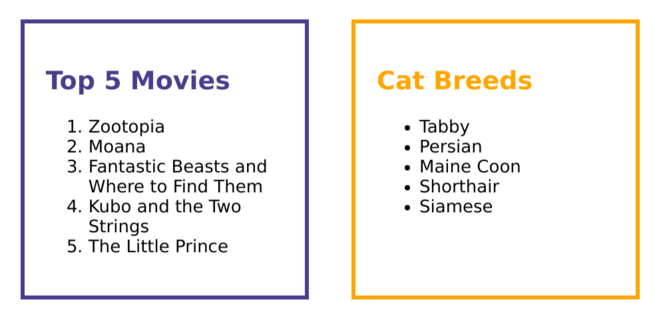
The client wants you to choose the colors, but the lists should look something like this:
Let's take it one step at a time, starting with the border colors. Click Next when you're ready.
Colors
There are over 16 million possible colors that can be made in CSS by mixing different amounts of red, green and blue. So far you've been using color names in your CSS code such as "red" or "green".
It's possible to create any one of these colors by mixing various amounts of red, green, and blue. But, as you can imagine, it's nearly impossible to come up with names for 16 million colors.
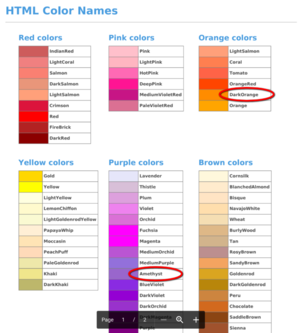
HTML Color Names
The colors that do have names are listed in your "HTML Color Names" cheat sheet (found in your ideaSpark folder).
Choose two colors from this list. Circle them or write them down on another sheet of paper.
If you don't have the color names sheet, click here to read it online).
Changing the border colors
Now that you have your colors chosen, it's time to use CSS to change the border color.
Last week, you put your lists and list headings inside
<section>
elements, allowing you to put a border around both. You used
section
for your CSS selector, which
selects
all
<section>
elements on the page and applies the styling rule to it.
How do you style just one?
How do you think you might change our style rule so that each section has a different border?
See if you can guess which answer is right:
-
Add another CSS rule for
section -
Add another declaration in the rule, like
border: 4px solid Orange - Use different elements for the sections so we can have different selectors
Let's try each of these to see what happens...
Try it out
There are three solutions below, but only one of them will actually work . Click each of the tabs below to try each solution. Be sure to click the Result button below to see the resulting output.
Classes
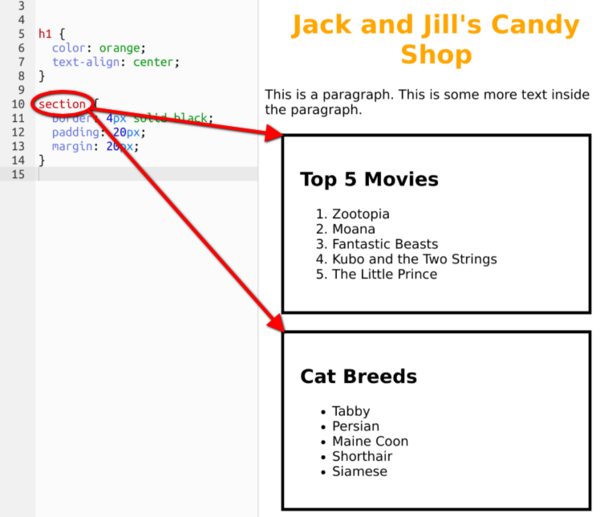
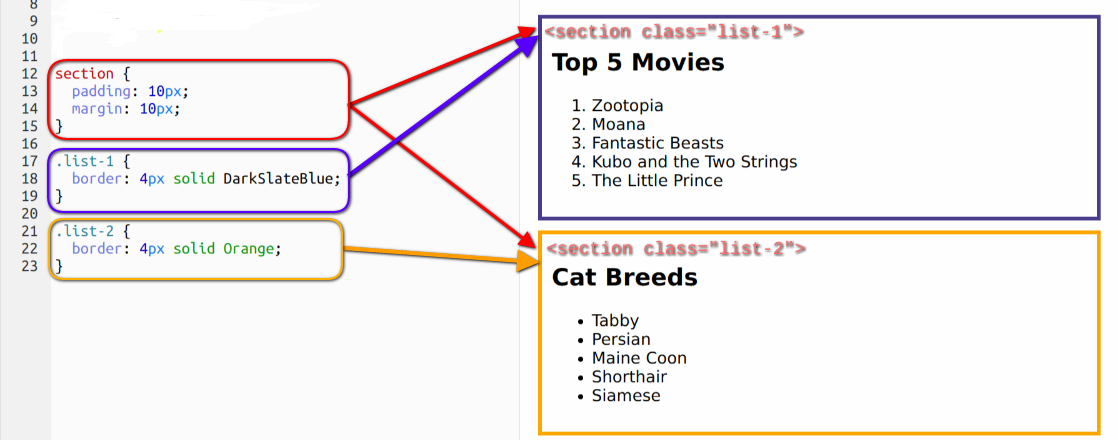
In our CSS code, the
section
selector matches
both
sections (shown by the red arrows). Since we still want margin and padding on both sections, we can leave those styles in that rule. When we give each section its own class name in the HTML using the
class="list-1"
and
class="list-2"
, that allowed us to write individual CSS rules for different border colors.
Add your class names
We used "list-1" and "list-2" for class names, but a class name can be whatever you want (as long as it doesn't use spaces or weird characters). So instead of "list-1" and "list-2", you could call them "spongebob" and "patrick". As fun as that is, we should still use class names that are meaningful and have something to do with our content.
In your HTML file, add the
class
attribute to your sections, then add rules to your stylesheet to change the border color to your two chosen colors.
index.html
<section class="list-1">
  <h2>Top 5 Movies</h2>
  <ol>
    <li>Zootopia</li>
    <li>Moana</li>
    <li>Fantastic Beasts</li>
    <li>Kubo and the Two Strings</li>
    <li>The Little Prince</li>
  </ol>
</section>

<section class="list-2">
  <h2>Cat Breeds</h2>
  <ul>
    <li>Tabby</li>
    <li>Persian</li>
    <li>Maine Coon</li>
    <li>Shorthair</li>
    <li>Siamese</li>
  </ul>
</section>
style.css
/** Remember to use your own colors! **/

.list-1 {
  border: 4px solid DarkSlateBlue;
}

.list-2 {
  border: 4px solid Orange;
}
Styling the list headings
The next requirement is to make the list headings the same color as the border.
You already know how to change the text color of a heading using the
color
property. But, as you know from before, this will select
both
<h2>
elements, so this won't work.
You could give them class names and style them differently, but you'd have to add class names to the
<h2>
in your HTML code.
/* this won't work! */
h2 {
  color: Orange;
}
Instead, you can write a selector that targets
only
the
<h2>
element that are inside your
<section class="list-1">
(or "list-2", or whatever you named the class). To do this write the selector for the
<section>
element followed by the selector for the
<h2>
, like the code to the right:
/* Use more specific selectors to match the right heading */
.list-1 h2 {
  color: DarkSlateBlue;
}
.list-2 h2 {
  color: Orange;
}
Side-by-side lists
Finally, the client wants the lists side-by-side:
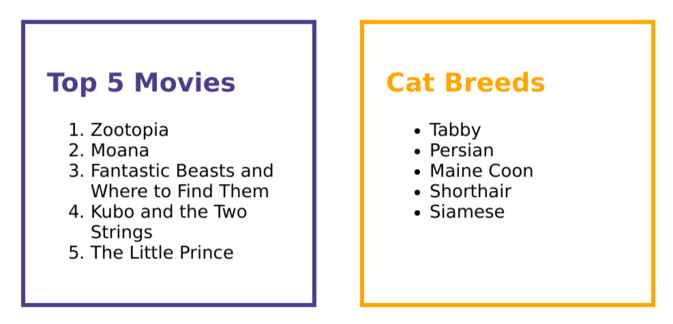
We can do this using a CSS technique called "flexbox", which is short for "Flexible box layout".
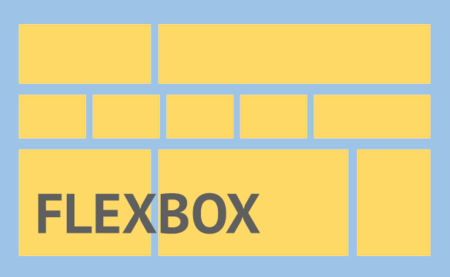
Using flexbox
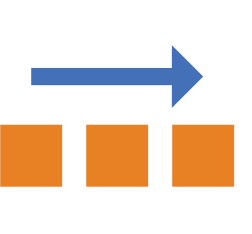
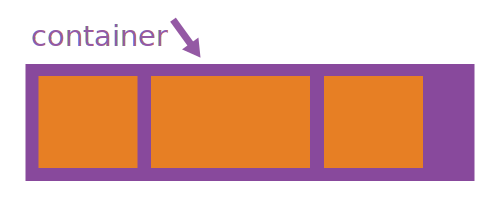
Flexbox allows us to put multiple items into a container, and create rules for how items in that container should be arranged. By default, flexbox arranges items horizontally, so all we have to do is put items into a flexbox container, and they'll line up side-by-side.
How to create a flex container
We need to put our sections inside a container, which can be any element. But what element should we use?
So far, every element we've used represents something in a document.
<h1>
is for headings,
<p>
is for paragraphs, and
<section>
is for sections of content.
Sometimes we need an element that doesn't represent anything, such as in cases ours when we just need to make a container for styling things.
Introducing the
<div>
The
<div>
element is a generic container for any content. It does not inherently represent anything. Web developers usually use it to group elements for purposes such as styling (using the class attributes). It can sometimes be tempting to use divs for all your code, but you should always use the element that makes the most sense for the content.
Create the container
Let's go ahead and "wrap" both sections in a single
<div>
element:
-
Insert an opening
<div>tag just above your first<section>element -
Insert a closing
</div>tag after the closing</section>tag of the second section. -
Highlight all the code between the opening
<div>tag and closing</div>tag, and press the Tab key. This will indent all the code so it's easier to see that it's contained inside the<div>element. -
Add a class attribute to the
<div>you just created, and give it a name, for example:<div class="side-by-side">. -
Add a CSS rule for that div that sets the
displayproperty toflex.
The resulting code
Your container, sections, and lists should now look something like this:
<div class="side-by-side">

  <section class="list-1">
    <h2>Top 5 Movies</h2>
    <ol>
      <li>Zootopia</li>
      <li>Moana</li>
      <li>Fantastic Beasts</li>
      <li>Kubo and the Two Strings</li>
      <li>The Little Prince</li>
    </ol>
  </section>

  <section class="list-2">
    <h2>Cat Breeds</h2>
    <ul>
      <li>Tabby</li>
      <li>Persian</li>
      <li>Maine Coon</li>
      <li>Shorthair</li>
      <li>Siamese</li>
    </ul>
  </section>

</div>
Your new CSS rule should look like this:
.side-by-side {
  display: flex;
}
If your lists don't appear side-by-side at this point, go back and check to make sure you followed the instructions correctly. Make sure you don't have any tags you forgot to close (remember our html boxes activity -- every box needs a lid).
Hyperlinks
Your client wants you to make a link on your 2nd HTML page that users can click to get back to the homepage.
When you link two pages together like this, it's called a hyperlink . These usually show up on web pages as underlined text colored blue or purple. When you move the mouse over a link, the cursor changes from an arrow to a "pointer" hand. When you click a hyperlink, the browser downloads the code for that page, and displays it on your screen.
Creating hyperlinks in HTML
To create a hyperlink in HTML, we use the
<a>
element (the "a" stands for "anchor" -- think of a boat anchor that links the boat to the shoreline). The
<a>
element only becomes a hyperlink if you set the
href
attribute. The
href
attribute should be set to the URL of the page you want to link to. Then, whatever text you want the user to click on goes
inside
the
<a>
element.
So, for example, if you want the words "click here" to link to "my-page.html", you would use:
<a href="my-page.html">click here</a>
Add a link to your homepage
On your 2nd HTML page (the one you created last time with a
<table>
in it), add a link to your homepage. The URL for your homepage is "index.html". The text for the link should say something like "Go home", and when you click on it it should take you to your homepage.
About us page
Your client now wants you to add a new HTML page called "About Us". They want a heading, a paragraph that describes their company (you can copy-and-paste it from their email), and a slideshow.
Create the new page
You should have a good idea of how to create a new page by now, but here's a quick reminder:
- Create a new HTML file in the main folder called "about-us.html".
-
Add
<!doctype html>on the first line -
Add the
<html>element just after that -
Add the
<head>and<body>elements inside the<html>element -
Link your stylesheet by adding
<link rel="stylesheet" type="text/css" href="style.css">inside<head>
Now, add your page heading (
<h1>
) with "About Us" inside the body, and the paragraph (
<p>
) just after that.
Upload the slideshow images
Make sure you've downloaded all the images from your client's email attachments. Then, upload them into your "images" folder in your Cloud 9 workspace. To do that, first select your "images" folder. Then, click on File > Upload Local Files . You can select multiple files at the same time by holding the Shift key while selecting files.
Click Next to learn how to use pre-built code to make a slideshow of images!
JavaScript
JavaScript is a very powerful programming language that is used on the vast majority of websites today. Web developers use JavaScript to do things that can’t be dione with HTML and CSS alone.
Luckily, you don’t have to know much JavaScript in order to use it on your website. In fact, we’re going to show you how to add a beautiful interactive image gallery to your website with very little code.
Using Other People's Code
Other developers have done a great deal of work solving the difficult problems for us, and have made their code freely available for use. This is called Open Source -- when the original source code is made freely available and may be redistributed and modified.
To create our slideshow, we'll add some HTML with our images, and then we'll include a
<script>
element that will link to some JavaScript code that turns that HTML into an interactive slideshow. We'll also be including another stylesheet that was made specifically for this code.
Slideshow: Create the HTML Structure
This example code shows how to put three images in the image gallery, but you can add as many as you want. Just use multiple
<figure>
elements with the same structure as a the first two.
Inside the figure element we have an
<img>
element (which you should be familiar with), and a
<figcaption>
element. This is optional, but it serves as a caption for the image.
Each figure element is contained within a
<section>
element, but we also need to give this section a class name so that the script can easily identify it.
Tip: Remember, you can always copy and paste! Think of how many images you have for the slideshow. Write the code for the first image (with the other elements inside), then copy-and-paste the code for as many images as you have. Then all you have to do is change the filename and caption for each one. A skilled developer always looks for new ways to save typing.
<section class=”my-slideshow”>

  <figure>
    <img src=”images/image1.png” height=”300”>
    <figcaption>Caption for image 1</figcaption>
  </figure>

  <figure>
    <img src=”images/image2.png” height=”300”>
    <figcaption>Caption for image 2</figcaption>
  </figure>

  <figure>
    <img src=”images/image4.png” height=”300”>
    <figcaption>Caption for image 4</figcaption>
  </figure>

</section>
Slideshow: Use the Code Library
Stylesheet
In the
<head>
element, add another stylesheet. This time, the stylesheet is coming from a different site, so we have to use the full URL:
<link rel="stylesheet" type="text/css" href="https://boldidea.org/extras/slideshow.css">
Tip: Try opening that CSS file in another browser tab by pasting the URL in the address bar. Notice all the code you don't have to write! Your web page pulls it all in automatically.
Javascript
Use the
<script>
element to include the slideshow javascript library. We put scripts at the very end of the
<body>
element (just be fore the
</body>
closing tag).
    <script src="https://boldidea.org/extras/slideshow.js"></script>
    <script>makeSlideshow('.my-slideshow');</script>
Important:
Be sure to include the closing
</script>
tag! It's always required, even when there's nothing inside the element.
Finished!
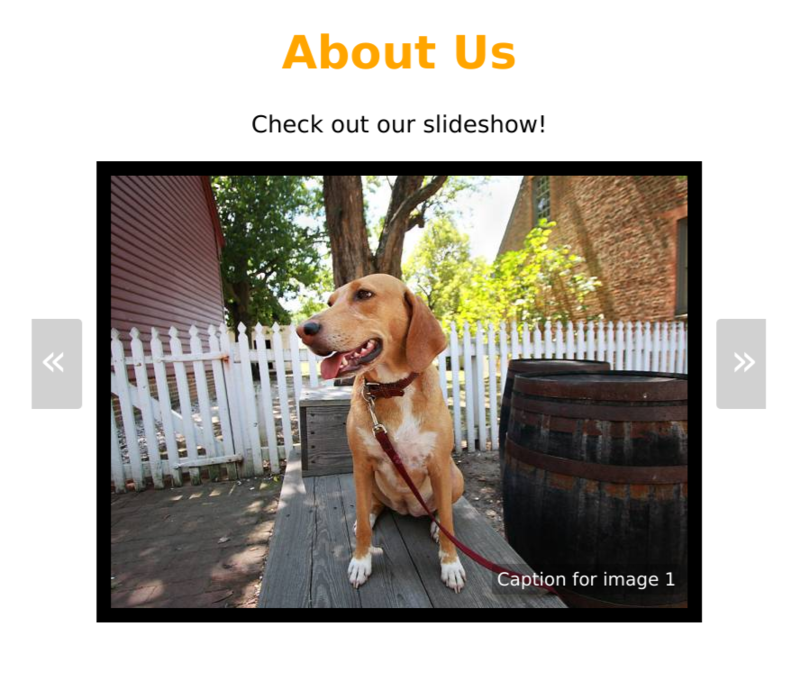
Save your page and refresh your live preview if needed. If all went well, your slideshow should look something like this:
